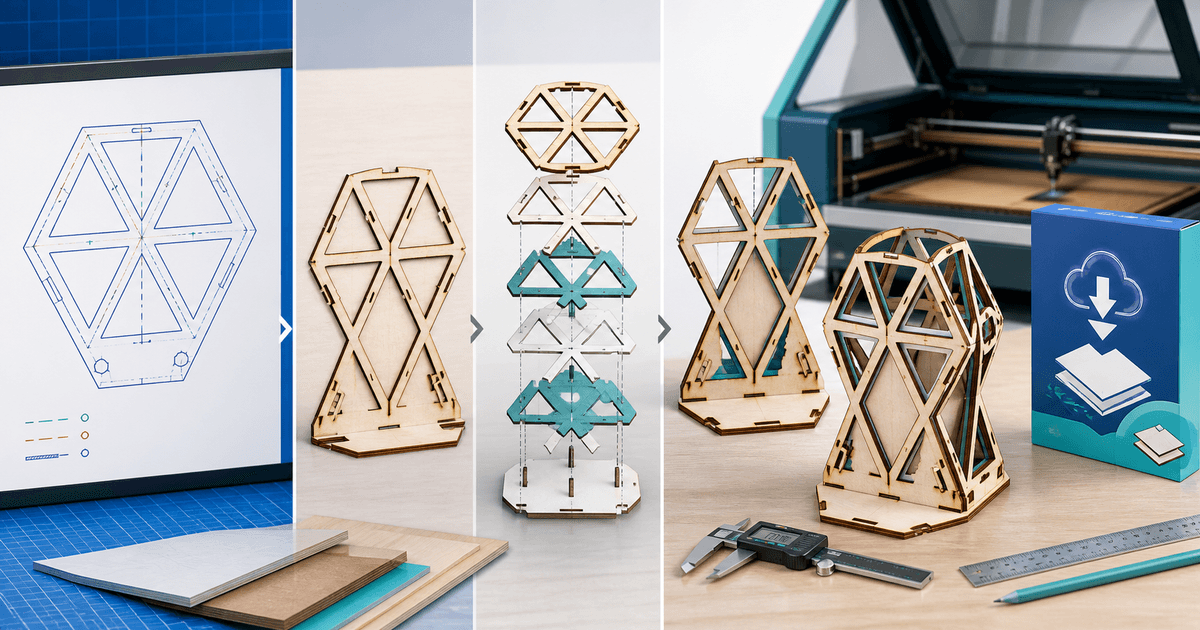
A laser-cut file is ready to sell only after the retail SVG or DXF imports at the advertised physical size, keeps cut, score and engrave operations separate, and produces an assembled test piece in a named material and thickness. A clean vector preview is not evidence that tabs fit, duplicate lines are gone or engraving layers map correctly.
This workflow is for designers selling reusable laser projects rather than generic clip art. Its original asset is a material-and-kerf release card tied to one photographed physical build.
Define the Machine Job Before Export
| Buyer job | Useful file | Required disclosure |
|---|---|---|
| Cut and assemble | SVG and/or DXF | Units, finished size, material thickness and kerf assumption |
| Engrave then cut | Layered SVG | Operation colors/layers and intended order |
| Resize decorative art | SVG | Minimum tested size and fragile details |
| CNC or metal fabrication | Machine-specific DXF | Units, open paths, tolerances and process limits |
Do not label one bundle “for every laser.” Controller software, import behavior, material, optics and machine condition all affect the result. Name the software versions and machines you actually tested, then give buyers editable settings as starting observations rather than universal power-and-speed promises.
Clean the Geometry
Convert fonts to paths only when the font license permits distribution of the resulting artwork. Remove duplicate strokes, hidden objects, stray points and overlapping cut lines. Close paths that should form parts, preserve deliberately open score lines and distinguish fills from outlines.
LightBurn's current documentation supports common vector formats including SVG and DXF and maps artwork layers to operations such as engraving and cutting. That import support does not guarantee scale or manufacturing fit, so verify the final exported files rather than the design-source document.
Create the Material-and-Kerf Release Card
| Field | Example test record |
|---|---|
| Machine and software | 10 W diode laser; LightBurn version and date |
| Material | 3.0 mm measured birch plywood |
| Kerf test | Five-slot coupon; chosen compensation recorded |
| Operations | Engrave, score, inner cuts, outer cuts |
| Assembly | Dry-fit, glue points and fragile tabs noted |
| Retail files | SVG and DXF reimported at stated dimensions |
Start with a small coupon using the same material batch. Measure the real thickness instead of trusting the label. Apply the resulting fit assumption to slots and tabs, then cut the complete product. Photograph the assembled result beside a ruler and record where sanding, glue or hardware is expected.
Reimport the retail SVG and DXF into clean documents. Confirm width and height in millimetres and inches, layer mapping, closed paths and cut order. Run a duplicate-line check: a repeated vector can make the laser traverse the same path twice, wasting time and increasing burn risk.
Package Variants Without Ambiguity
Separate folders by tested material thickness and do not scale tabbed designs casually. Include the original-size SVG and DXF, a dimensioned PDF preview, operation key, assembly guide, release card and license. Give every filename units, thickness and version, such as `desk-stand-3mm-280x190mm-v1-1.svg`.
State whether the license covers personal making, a limited number of physical products, unlimited finished-product sales or no commercial production. Keep redistribution of the digital source separate from permission to sell physical items.
Deliver the Tested Bundle
Use PayRequest's graphics and design download workflow for the listing and automatic file delivery for the versioned ZIP after successful payment. Show the physical test build, not only a render, and put formats, size, thickness and license before checkout.
Complete a buyer test from payment through download and reimport. Publish only when the delivered archive matches the release card, the assembled example proves the fit assumption and buyers can identify which variant applies before opening a file.